


Check our the CamRanger mini setup page for information on how the initial CamRanger mini setup and how to download the app.
For a complete description, download the iOS or Android CamRanger user manual.
The screenshots are for an iPad, but are very similar for an iPhone or Android device.
Connection Screen
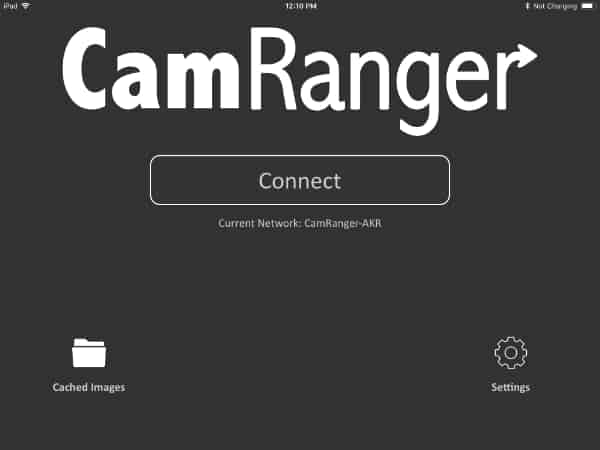 After starting the app, the connection screen will display. At the bottom of the screen are two buttons: Cached Images and Settings.
Press the Settings button to bring up the Settings screen. Note that a connection has not been made with the CamRanger at this point so some settings will not be available. Press the Cached Images button to view thumbnails for all images that are currently saved in the temporary cache. These are images that were viewed recently.
The current WiFi network is listed under the “Connect” button. The iOS device must be connected to the CamRanger mini WiFi network, so the network listed must be the CamRanger network or the connection will fail. Press the “Connect” button to attempt to connect with the CamRanger mini and camera.
Main Screen
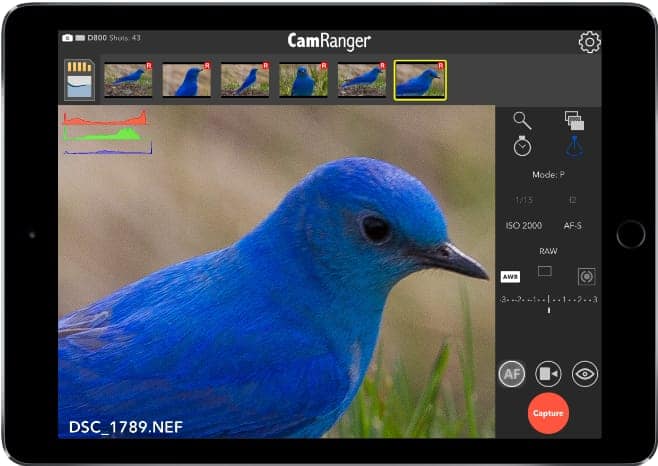 The status bar on the top shows the camera’s battery life, camera name, and number of shots available on the camera’s removable media using the current settings. The gear button on the right of the status bar opens the app settings.
As images are capture, the thumbnails are automatically shown along the top of the screen. Select a thumbnail to view the full resolution image.
Them main image view displays both captured images and the live view stream. Captured images are first displayed at a “fit to window” size. The image’s scale percentage is shown at the top right. Images may be zoomed in and out with a two finger pinch or by double tapping. Press the “…” button at the bottom right of the image to delete or save the image or to expand the view to full screen.
When live view is on, the image in the main image view is automatically updated as new live view frames are received. During live view the image may be single tapped to focus on that point, also known as “touch focus”. Double tapping on the image during live view will zoom in at that point, and then alternatively zoom back out. When zoomed in, arrow buttons will appear at the edges enabling small adjustments to the zoom positioning.
There are a number of overlays, such as histogram, file name, electronic level, etc., that can be turned on or off from the settings.
Camera Properties
The camera properties look slightly different depending on the device, orientation, and camera model. If the property can be changed, then it will be white. Disabled properties are grey. The values displayed are the values that are currently set on the camera.
Camera Actions
The red capture button initiates the camera trigger. The exact camera behavior depends on the camera and camera properties, most importantly the capture mode. For Canon cameras, a yellow button will appear at the top left of the Capture button. This button is the equivalent of performing a “half-press” of the camera’s shutter button.
The auto / manual focus toggle button shows if the camera will attempt to focus as part of capture. Depending on the camera and configuration the user may or may not be able to change this.
The live view button toggles live view on and off. Live view must be controlled from the CamRanger and not from the camera.
The movie button toggles movie mode on and off. When movie mode is on, the Capture button changes to “Record” and pressing this button will start and stop movie recording.
HDR/Advanced Bracketing Tab
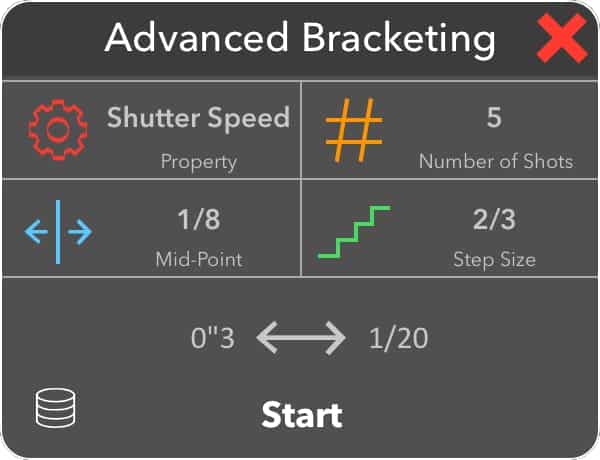
The HDR bracketing works by actually adjusting the camera’s exposure parameters between shots. The only limitations to the bracketing is the camera’s possible exposure parameters.
The property field specifies the camera property to be changed. The three options are Shutter Speed, Aperture, and ISO. The Mid-Point indicates the middle exposure of the sequence. The step size sets the number of steps to adjust the exposure between each shot. The number of shots specifies the number of shots in the sequence. The maximum number of shots is dynamically calculated based on the mid-point and the possible camera values.
HDR sequences can also be performed when the camera is set to bulb mode. The settings are similar, except that the property is shutter speed/bulb duration and the mid-point is set in seconds.
Timer Tab
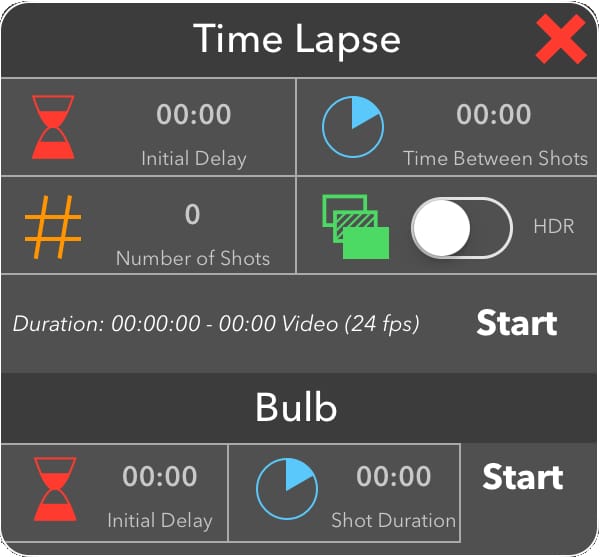
The timer tab is used to configure the CamRanger as an intervalometer and specify exposure times when the camera is bulb mode.
The initial delay is the amount of time to delay before the sequence is started. This can be useful for making a custom timer mode with a set delay. The number of shots to take must be entered as well as the time between shots.
If the camera is in manual mode, the HDR switch may be toggled on. Each capture will then be an HDR sequence of captures. The HDR parameters are those that are set in the HDR tab.
Press “Start” to begin the sequence. After started, the iOS device does not need to remain connected to the CamRanger. So there is no need to remain close by during a long time lapse sequence.
When the camera is in bulb mode, the timer tab can also be used to perform bulb shots with a specified duration. The Start button in the Bulb section will only take a single shot. However, time-lapse can be combined with bulb mode to perform a time-lapse with each bulb duration set by the shot duration.
Focus Tab
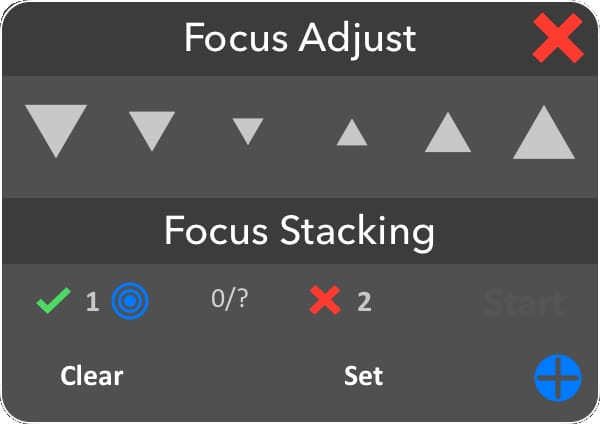
Live view must be turned on to use the focus tab. The arrow buttons in the Focus Adjust section perform a large, medium, or small focus adjustment depending on the button selected. The arrows pointing down move the focus in closer while the arrows pointing up move the focus further away.
The new focus stacking method requires to user to specify the nearest and furthest focus points and then the CamRanger automates the step size and number of shots based on the camera, lens, and aperture.
Point 1 is the nearest focus point and point 2 is the furthest away. The points are set by pressing the respective “Set” button when the focus is at the desired point. To set the first focus point any focus adjustment method can be used. However, after a point has been set only incremental focus adjustments can be used. Once a focus point is set, press the bullseye button to move the focus to that position.
After the focus points are set, the Start button will enable and pressing it will start the focus stacking process. Press the plus button to reveal advanced focus stacking options.
Card Contents
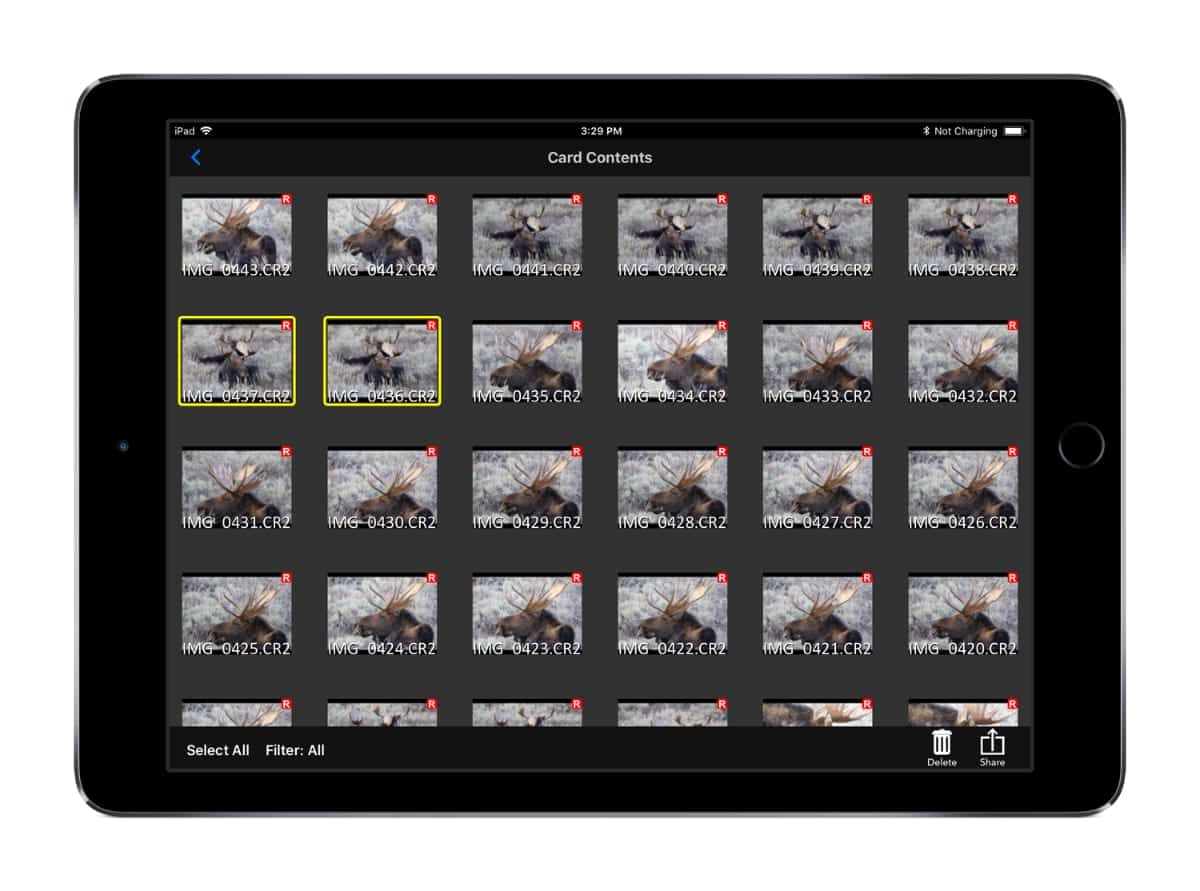
Press the Card Contents button at the top left to open a new window that displays all the thumbnails for the images on the camera’s memory card.
To view an individual image, double tap on the thumbnail. Multiple images can be selected by tapping on the thumbnails. The images can then be deleted or shared with the Delete and Share buttons on the bottom right.