


Check out our YouTube video for an overview of the HDR features.

Cameras have a variety of options for performing exposure bracketing. The CamRanger exposure bracketing can be more flexible and powerful than in-camera options. The CamRanger actually changes the camera exposure settings between captures. The CamRanger 2 does not actually merge the images. That will require some sort of HDR software for post processing.
The CamRanger can remotely change the shutter speed, aperture, or ISO of the camera between photos. Shutter speed is commonly changed, but ISO can be useful to achieve different effects or to avoid motion blur with longer exposures.

Because the camera’s exposure is being changed, the camera’s exposure mode must be set to manual.
The advanced bracketing is very flexible. The user can chose to vary each shot by up to 3 stops, in 1/3 increments. So it is even possible to take 50+ shots, bracketing all the way from 1/4000 to 30″.
To access the bracketing tab, press the button made of layered rectangles located near the camera settings.

Enter a mid-point, number of shots, and number of exposure stops to adjust between each shot. The maximum number of shots is dynamically calculated. For example, if the mid-point is 1/1000, few shots can be taken before the camera’s faster possible shutter speed is reached. So the maximum number of shots will be higher if the mid-point is set to 1/10, for example. After configuring the bracket sequence, the start and end exposure values will be automatically calculated and displayed to the user.
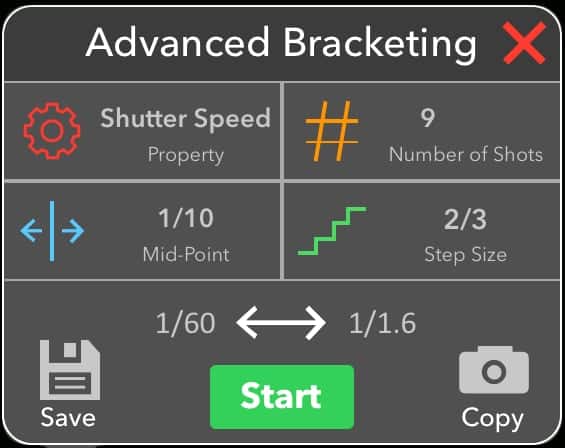
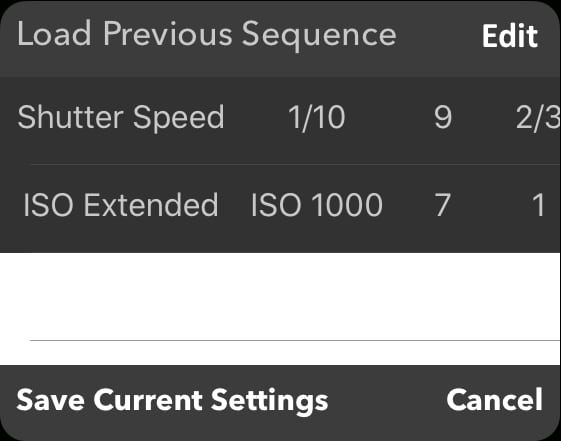
With iOS devices only, it is possible to save bracketing sequences as presets and then reload them later. The copy button will set the mid-point value to the camera’s current value for the selected exposure setting.
It is also possible to do bulb mode bracketing. When in bulb mode, the HDR tab allows the user to enter the duration of the mid-point instead of a set value.
The speed of bracketing depends on a variety of factors, mostly related to the camera being used.
- Nikon – Newer Nikon cameras may have less than 1/2 second between shots, but older Nikons are closer to 1-2 seconds between.
- Canon – Canon cameras have a little less than 1 second between shots.
- Fujifilm – Fujifilm cameras have a little less than 1 second between shots.
- Sony – Sony cameras have about 5 seconds between shots. The in-camera bracketing is likely a better choice except for very specific scenarios.