


The CamRanger 2 can be configured using the web GUI. To access, first connect to the CamRanger 2 network and then use a web browser to navigate to http://192.168.82.1. Enter the default password of admin and click “Login”. This can be done with a phone, tablet, or computer.
For normal operations it is not necessary to change any settings. However, advanced users are able to make significant changes and customization. Please also note that many of these changes require the network or WiFi connection to be reset, so the connection to the Web GUI may be temporarily lost when making updates.
Advanced Network Settings for Wireless Camera Connection
The network tab displays general network and Ethernet settings. The user can change the IP address, enable or disable the DHCP server, and change the Ethernet port mode to LAN or WAN. The MAC address is also displayed. It is very rare to need to change these and should only be done by someone very knowledgeable.
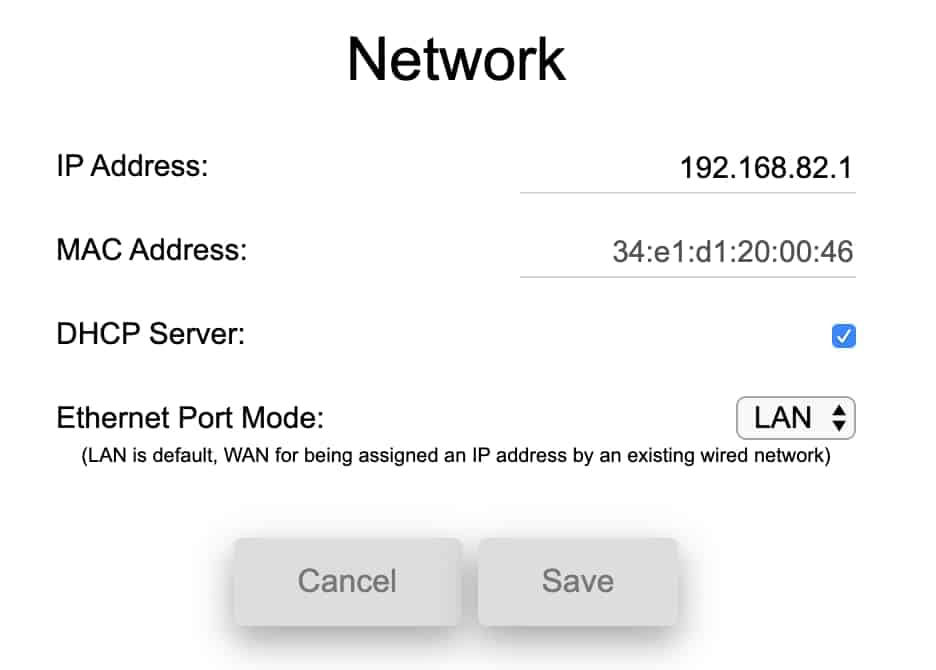
For nearly all circumstances, LAN is the correct Ethernet port mode. WAN can be used when the CamRanger 2 is connected to an existing router with an Ethernet cable. The CamRanger 2 will then be able to be assigned an IP address from the existing router.
Advanced WiFi Channels for CamRanger 2 connection
The WiFi tab allows the user to configure the wireless networks.
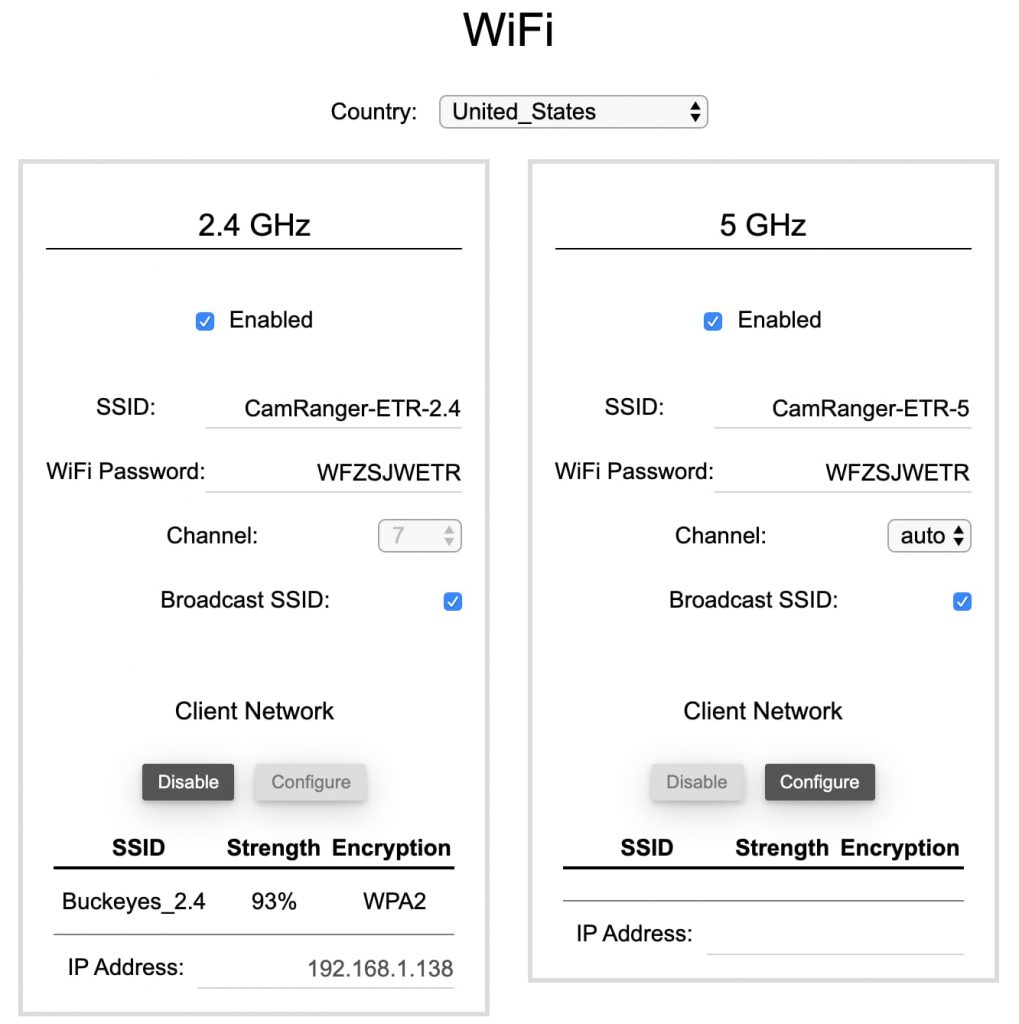
The country drop-down should be set to the user’s location. This will ensure that the proper WiFi channels are available.
The available settings are the same for the 2.4 GHz and 5 GHz and are listed side by side. Generally “auto” should be selected for the channel and the CamRanger will select a good channel upon startup.. However, this may be overridden to use a specific channel. Additionally, this value will be locked to a particular channel if the network is bridged into an existing network.
The CamRanger 2 can join into an existing WiFi network by configuring a client network. This can be useful for scenarios where the user wants to use the CamRanger 2 and also access an existing network, particularly when the existing network has Internet access. The CamRanger 2 can then be used from the normal CamRanger 2 network as well as the existing network. The CamRanger 2 will continue to attempt to rejoin this network upon start up.
To join an existing WiFi network, press the “Configure” button for the appropriate network frequency and follow the prompts. If the CamRanger 2 has properly joined the WiFi network, the network name, status, and assigned IP address will be listed. To disconnect from the existing network, press the “Disable” button.
Watch the video for a demo of how to join an existing WiFi network.

System
The system tab displays various battery and system level information and settings.
The firmware version is listed as well as options to upgrade the firmware or reset back to factory defaults. It is important to only upgrade the firmware with CamRanger provided firmware files.
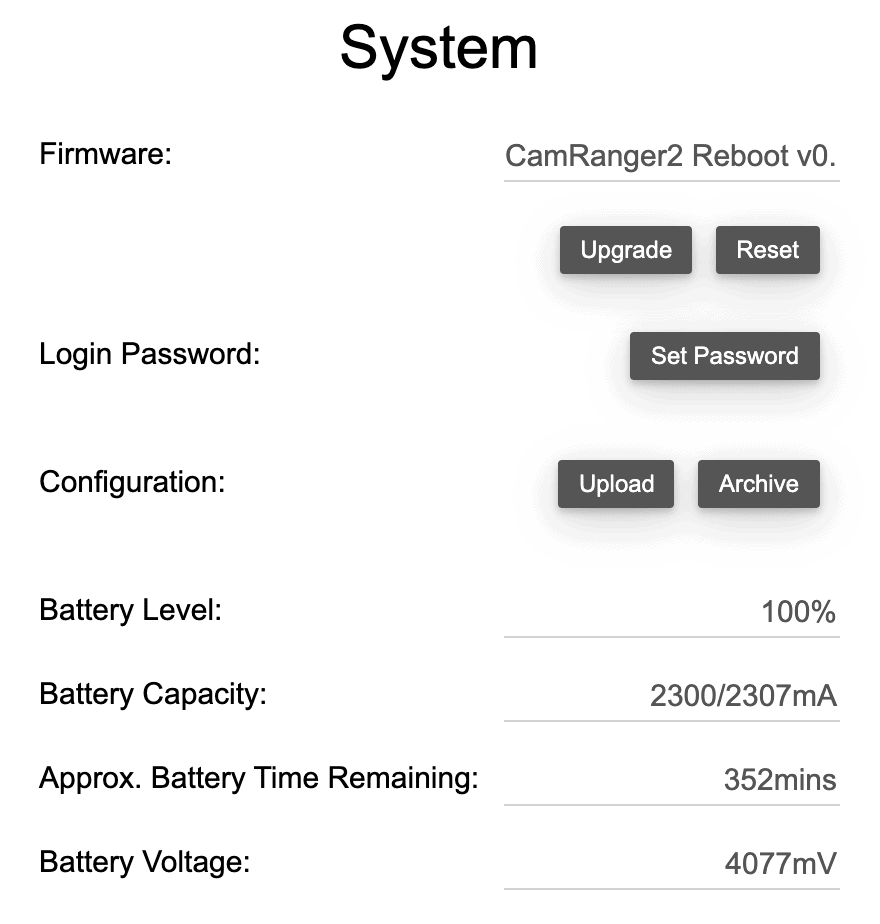
The current device configuration can be saved and then later re-applied, by using the “Upload” and “Archive” buttons. The Archive button will download a zipped file of the device settings. The Upload file can then be used to select one of these zipped files and apply the saved settings.
Basic battery statistics are also listed. These values are approximate, though the more charge and discharge cycles the battery does without being removed, the more accurate it will be. Diagnostic battery statistics can also be displayed.
Direct Sharing: Wirelessly print images, backup to SD card, or upload to FTP server with Canon, Nikon, Sony or Fujifjilm
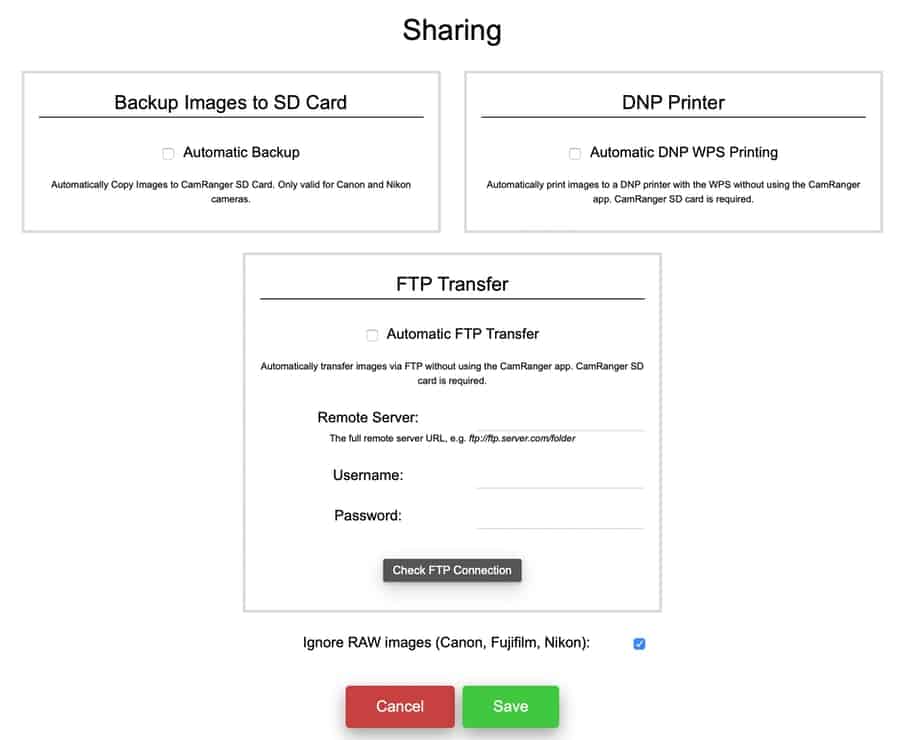
The CamRanger 2 is typically used with the CamRanger 2 application. However, there are a few options for transferring images without using the CamRanger software: printing with a DNP wireless print server, uploading to an FTP server, or copying to the CamRanger SD card.
All of these methods and transferring images require an SD card in the CamRanger 2. For printing or FTP transfer for the CamRanger to able to communicate with DNP or FTP server. Typically this requires bridging into an existing network as detailed in the WiFi configuration section.
The “Ignore RAW images” option can be checked to ignore RAW images if shooting RAW+JPG. This is not applicable for Sony cameras.